I feel that every developer should have this tool in their machine as this helps to make your code quality better than 90% of the developers.
Today in this Post we will learn how to install SonarQube in your local machine. Basic Requirement for installing SonarQube is, you need to have JDK installed in your machine. and latest version of SonarQube will need Latest version of JDK.
If you are using Java version 1.8 then it is recommended to use SonarQube version 7.X.X You can download any version of SonarQube from the link here . If you want to have older version, navigate to Historical Downloads and click on drop down at the bottom and download community edition.
After Downloading you will get a folder with name sonarqube-x.x.x. extract this folder and keep it in your favorite location. to Start the SonarQube in your Local navigate to bin folder and select the operating system.
C:sonarqube-7.9.2binwindows-x86-64
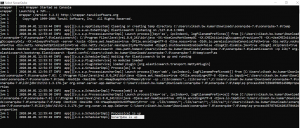
Now double click on StartSonar.bat file and a command prompt will appear and execute some commands as shown below.
When You get the message SonarQube is up, That means that you can start checking your code quality. Do not close this window as long as you are working on SonarQube.
By Default the SonarQube runs on port 9000. go to your favorite browser and type
http://localhost:9000 and you will land up on default SonarQube home Screen.
now if you have a maven project, you can build your project in different cmd prompt by cmd
mvn clean install
and then once the build is successful, you can sun the sonar command from same build location. Sonar command is :
mvn clean install
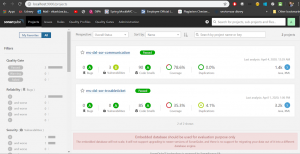
once you get build Success go to browser and open http://localhost:9000 . you can see your scanned project.
If you get this screen that means your installation is successful. and congratulations to you taking a step forward towards being a good developer.


![Read more about the article Can’t connect to mysql server [solution]](http://13.210.57.36/wp-content/uploads/2019/12/mysql-300x169.jpg)